2016年6月2日 星期四

VTK - The Visualization Toolkit 編譯

1. 至下列網站下載"CMke"。

https://cmake.org/


2. 至下列網站下載"VTK"。
http://www.vtk.org/
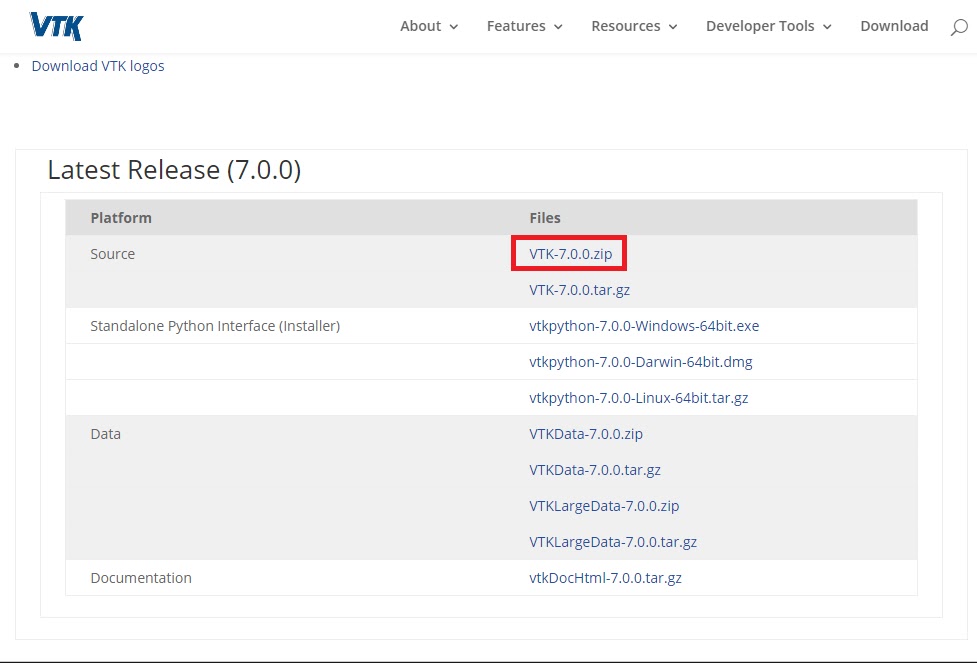

3. 安裝"cmake-3.5.2-win32-x86.msi"。

 4. 解壓縮"VTK-7.0.0.zip"。

5. 新增資料夾,修改名稱為"VTKbin"。

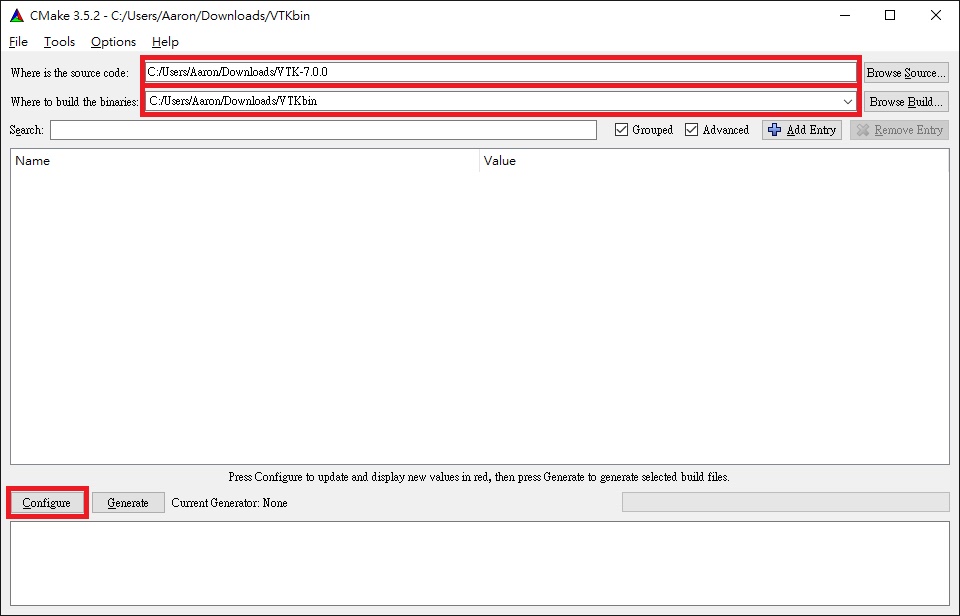
6. 設定編譯路徑,
Where is the source code: 選擇剛剛解壓縮的原始碼路經。
Where to build the binaries: 選擇剛剛新增資料夾路經,存放之後編譯完成的檔案。
最後按"Configure"。
7. 選擇編譯器,我這裡選擇"Visual Studio 12 2013 Win64",之後按"Finish"。

8. CMake進行組態測試的動作。

9. 組態設定,
BUILD_EXAMPLES:是否要產生範例程式的專案,這裡請打V。
BUILD_SHARED_LIBS是否要將函式庫以動態函式庫的形式產生,這裡請打V。
BUILD_TESTING:是否要產生測試用的專案,不勾選
其它項目建議使用預設值,不要做修改。
最後再一次按"Configure"。

10. 開始設定組態。

11. 按"Generate"。
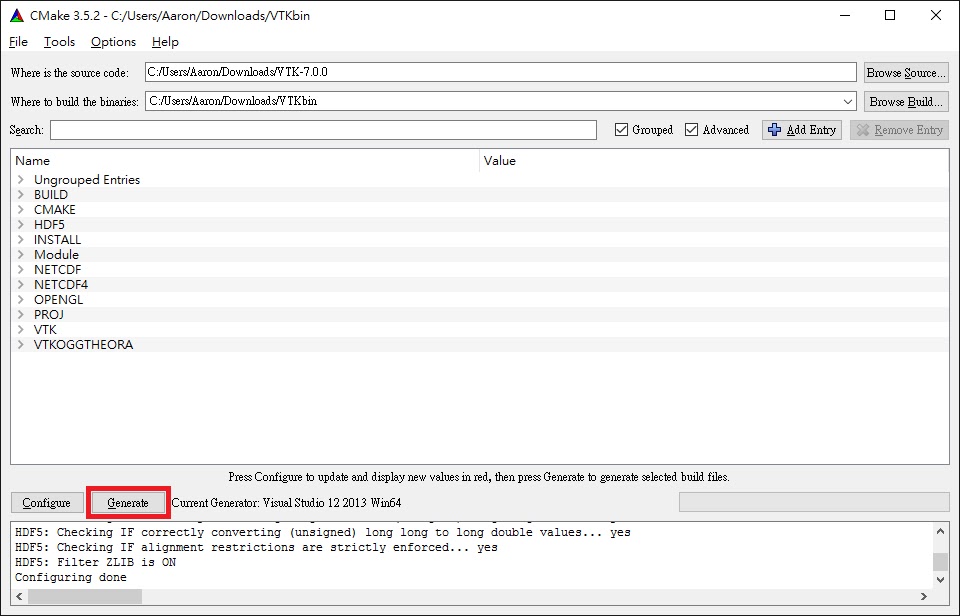
12. 開始在之前新增資料夾"VTKbin"增加"Visual Studio 12 2013 Win64"的專案計畫。

13. 至"VTKbin"資料夾下,點選"VTK.sln"專案。

14. 點選"ALL BUILD",按"滑鼠右鍵",點選"建置(U)"。
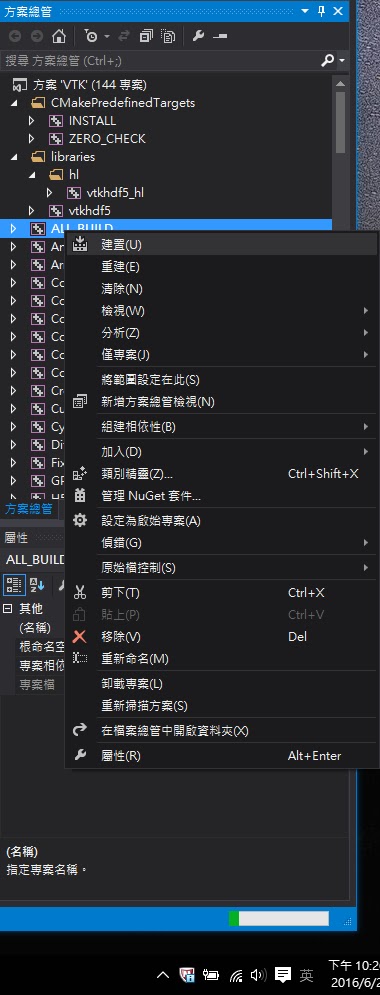
15. 開始編譯VTK程式。
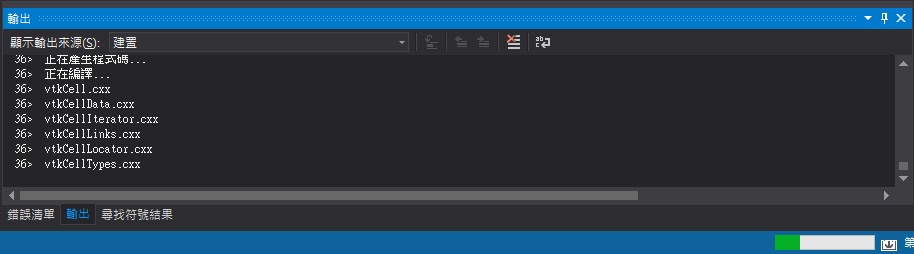
16. 編譯結果產生在"\VTKbin\bin\Debug"下。

2015年12月14日 星期一

Quartus II 13.0 - (10) 設定頂層模組

1. 使用滑鼠點選專案FPGA型號,再按"滑鼠右鍵",選擇"Settings..."。

2. 選擇"General" > "Top-level entity:",再選擇頂層模組程式,按"OK"。

2015年10月19日 星期一

OpenCV 3.0 與 Visual Studio 2013(vc12)環境設定

當新增一個project後可以依照下列所示設定OpenCV 3.0環境設定。

1. 使用滑鼠點選計畫名稱後按"滑鼠右鍵" > "屬性(R)"。

 2. 選擇"組態屬性" > "C/C++" > "一般",在"其他Include目錄"中輸入OpenCV 3.0函示庫路徑,我這裡輸入"C:\opencv\bulid\include"。

3. 設定Link參數,選擇"組態屬性" > "連結器" > "一般",在"其他程式庫目錄"中輸入lib路徑,我這裡選擇支援x86架構與Visual Studio 2013的路徑,輸入"C:\opencv\build\x86\cv12\lib"。

**如果是Visual Studio 2012就選擇vc11的路徑。

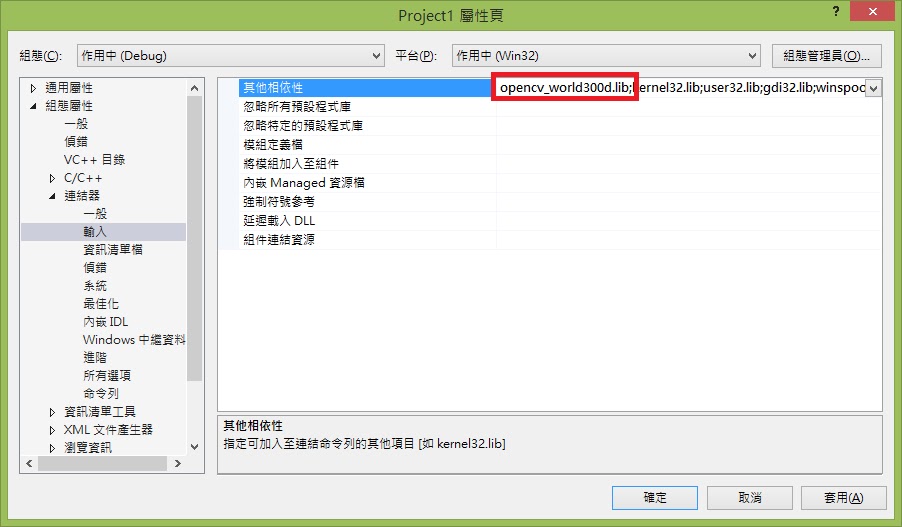
4.  設定Link參數,選擇"組態屬性" > "連結器" > "輸入",在"其他相依性"中加入"opencv_world300d.lib"。

5. 最後至安裝OpenCV 3.0的路徑中"C:\opencv\build\x86\vc12\bin"將"opencv_world300d.dll"複製到project 您所開發的原始程式相同路徑下,設定完成就可以撰寫程式,按下"建置"按鈕編譯程式了。

**如果是Visual Studio 2012就選擇vc11\bin的路徑,將"opencv_world300d.dll"複製到project\Debug路徑下

2015年10月17日 星期六

Open CV (5) 使用Windows Form - PictureBox 顯示影像

pictureBox顯示影像

1. 在視窗中增加 PictureBox、Button、Timer控制項,之後再使用滑鼠快按兩下"button1"。

2. 輸入範例程式,最後按"開始偵錯"按鈕進行編譯。

stdafx.h


1
2
#include <cv.h>
#include <highgui.h>

Form1.h

1
2
3
4
5
6
7
8
9
10
11
12
13
namespace test {
    using namespace System;
    using namespace System::ComponentModel;
    using namespace System::Collections;
    using namespace System::Windows::Forms;
    using namespace System::Data;
    using namespace System::Drawing;
    using namespace cv; //add source code
    CvCapture* capture; //add source code
    IplImage* frame; //add source code

1
2
3
4
5
6
7
8
9
10
11
private: System::Void button1_Click(System::Object^  sender, System::EventArgs^  e) {
             capture = cvCaptureFromCAM(0);
             timer1->Start();
         }
private: System::Void timer1_Tick(System::Object^  sender, System::EventArgs^  e) {
             frame = cvQueryFrame(capture);
             pictureBox1->Image = gcnew
                 Bitmap(frame->width,frame->height,frame->widthStep,
                 Imaging::PixelFormat::Format24bppRgb,(System::IntPtr) frame->imageData);
         }

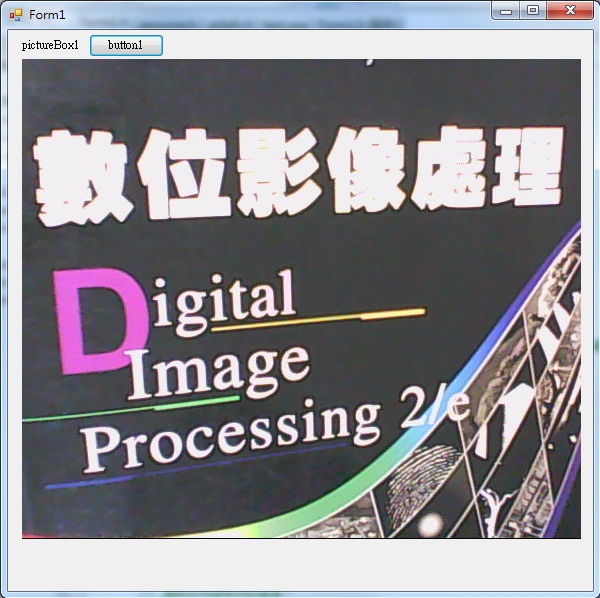
3. 執行結果。